Article
Free PBR Generator: How to Create Realistic Materials Instantly

Discover how the free PBR generator on GenPBR can transform a flat image into a realistic, physically based rendering material in seconds. This step‑by‑step tutorial shows how to generate normal, roughness, metallic, and ambient occlusion maps with no login required, giving you pro-quality textures for game engines, Blender, and more.
Have a flat texture or photograph? You can turn it into a fully-realistic PBR material in seconds using the free PBR generator from GenPBR. This browser‑based tool uses algorithmic (not AI) methods to generate high-quality normal, roughness, metallic, and ambient occlusion maps — all on your device, for free.
Why Use a Free PBR Generator?
No subscription or payments required.
Client-side processing: your textures stay on your computer, keeping them private and fast.
Algorithm-based: consistent, predictable results compared to black-box AI.
Generates a complete PBR set: normal, metallic, roughness, and ambient occlusion.
Real-time preview with a 3D viewer.
Bulk upload support for processing multiple textures at once.
How to Create Realistic Materials With the Free PBR Generator
1. Upload Your Base Texture
Go to the GenPBR website and click “Try Free Generator” — no login required. Upload any flat texture (albedo/color) like a brick wall, tile, or wood grain.
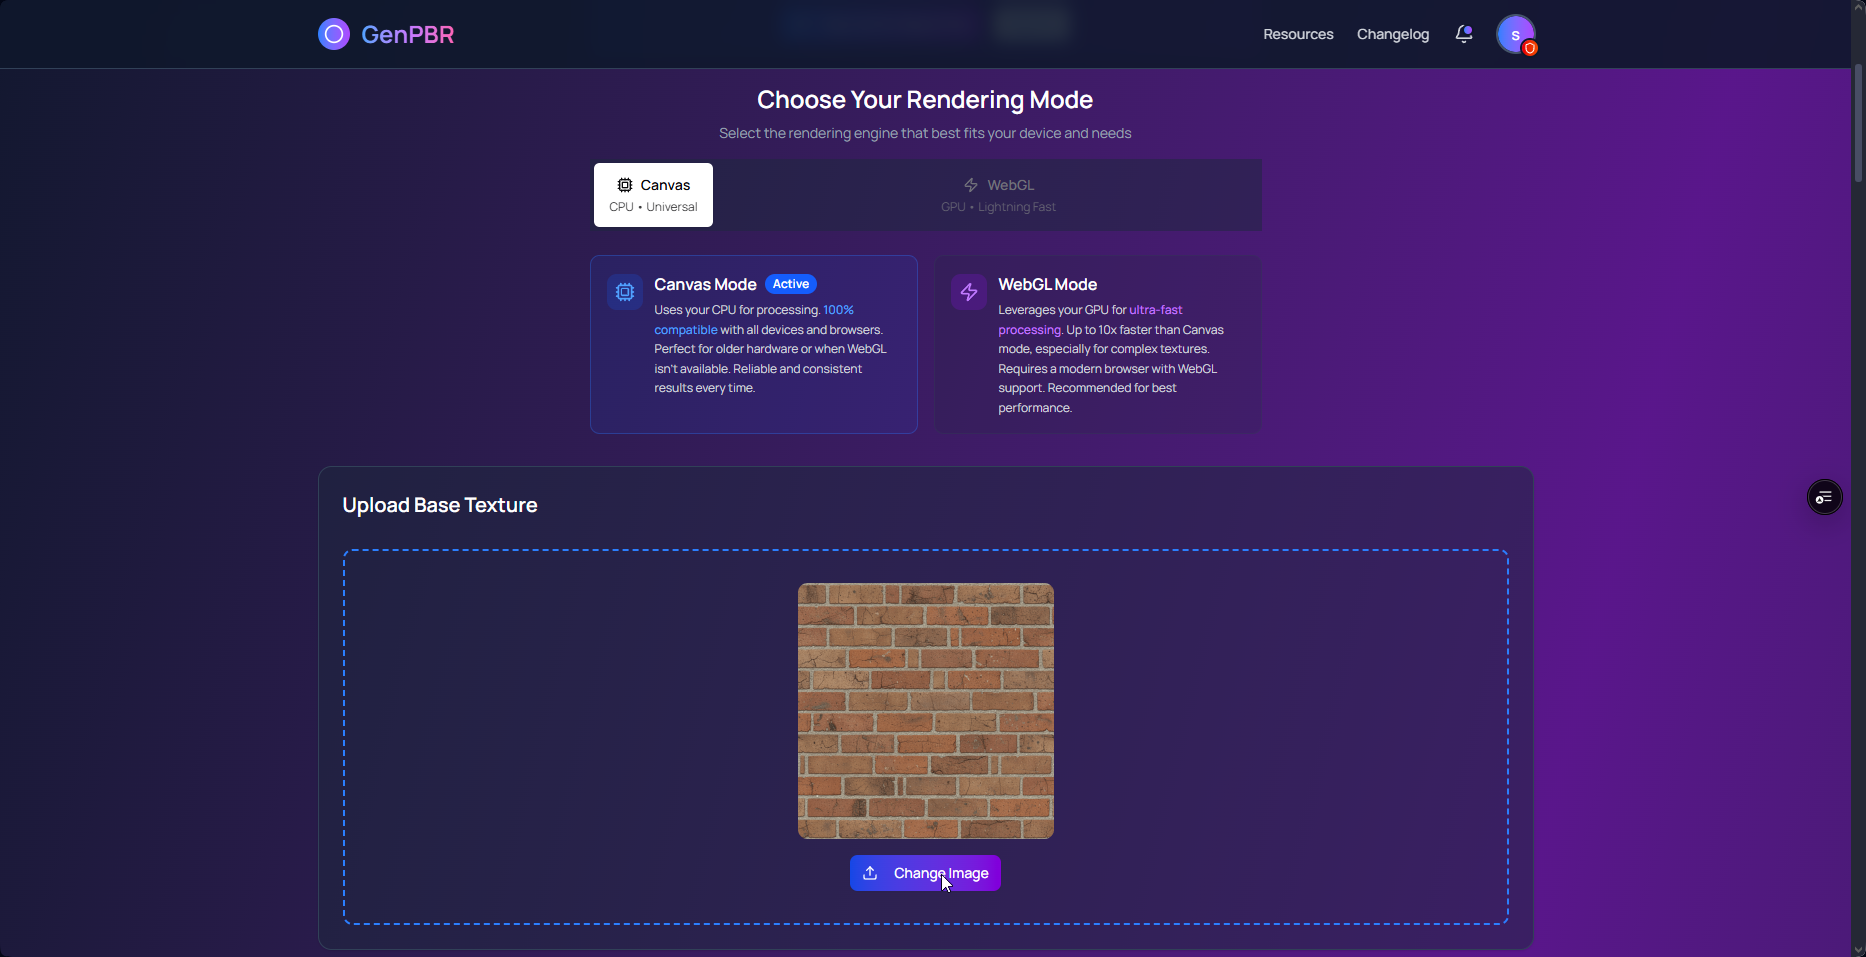
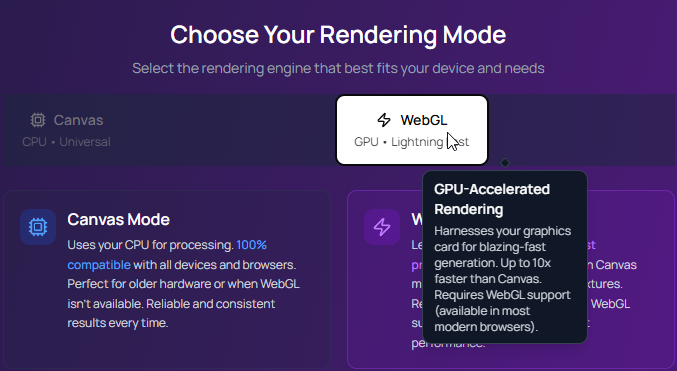
2. Choose Your Processing Mode
Select between Canvas API (CPU-based) or WebGL (GPU-accelerated).
Canvas API works on almost any device.
WebGL provides faster processing and more accurate map generation on supported hardware.
3. Adjust Map Strength (Optional)
After uploading, tweak settings like normal map intensity or roughness detail. Preview changes in real time to get the look you want.
4. Generate the PBR Maps
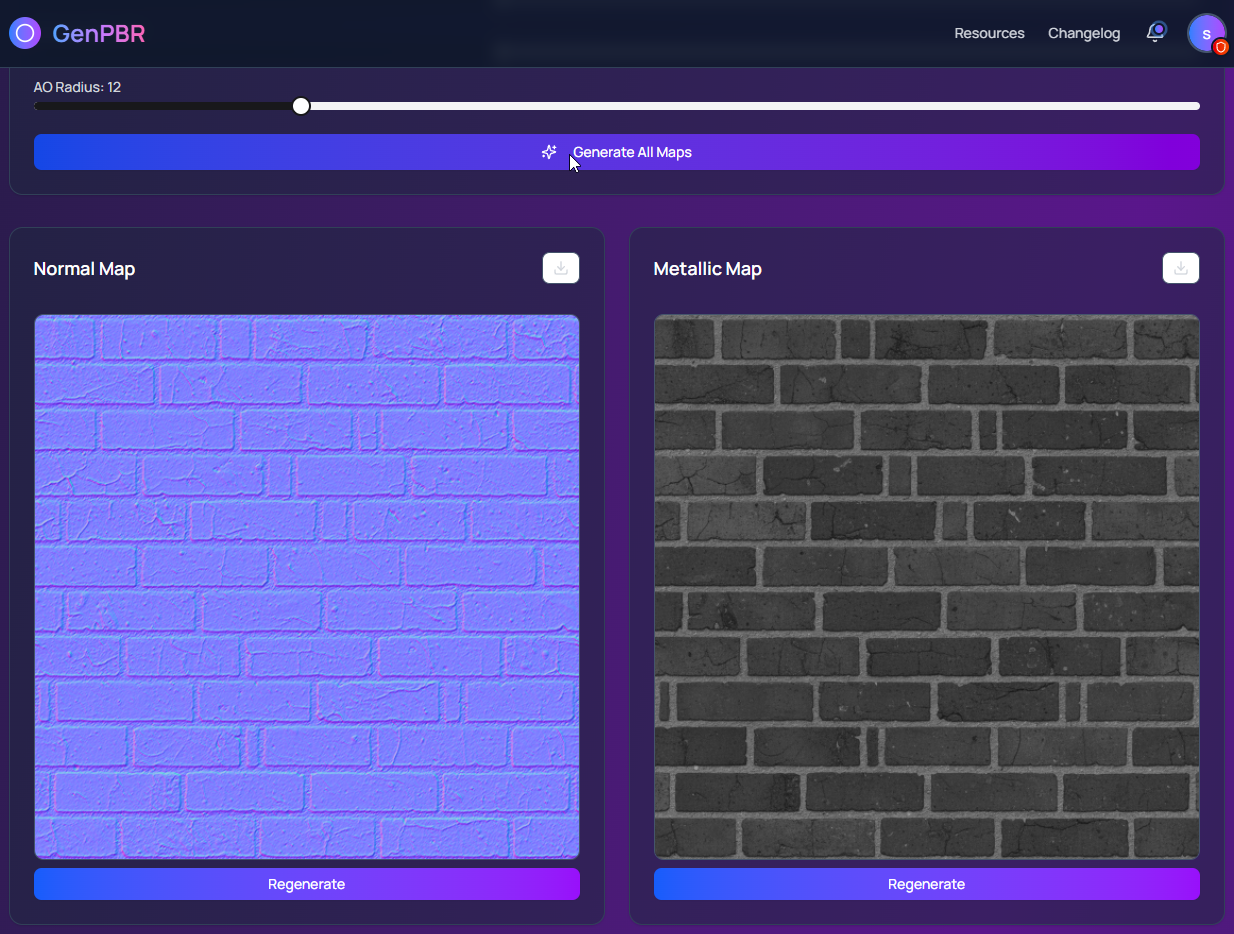
Click “Generate” to compute all maps:
Normal map — surface bumpiness and detail.
Roughness map — how matte or glossy the surface is.
Metallic map — which parts behave like metal.
Ambient Occlusion (AO) — soft shadows in crevices.
5. Preview in 3D
Use the built-in 3D viewer to see your material applied to a model. Rotate, zoom, and adjust lighting in real time. This before/after visualization helps fine-tune your textures.
6. Export Your Maps
Download individual maps. Use them in Unity, Unreal Engine, Blender, Maya, Roblox, or any engine that supports PBR materials. Bulk uploads let you export multiple sets at once.
Tips for Best Results
Use clean, seamless base images for the best generated maps.
Avoid over-strengthening normal maps; subtlety usually looks more realistic.
Preview often in the WebGL viewer to catch artifacts early.
Save in batches when building a PBR library.
Everything is client-side, so your textures remain private and secure.
What Comes Next?
Once you have your PBR maps, you can explore deeper workflows:
Import and apply PBR materials in Blender with our Blender PBR workflow tutorial.
Fine-tune maps using advanced techniques in the GenPBR tools guide.
With the free PBR generator, you can turn flat images into rich, realistic materials that breathe life into your 3D scenes. Start building your own professional-quality texture library in minutes.
About Star
GenPBR is a professional tool for generating PBR textures using industry-leading algorithms. Create photorealistic materials for games, architecture, and 3D art with proven techniques for Unity, Unreal Engine, Blender, Maya, and Roblox.